My Trainer
LOGIQ S8 XDclear 2.0
Basic Exam Overview
-

 Pressing the Patient Touch Panel key displays the Patient Screen on the monitor.
 -
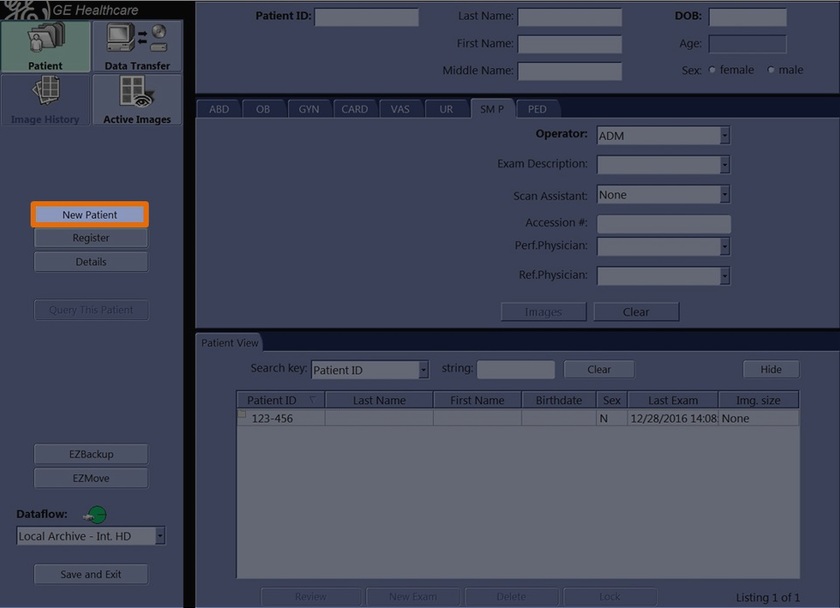 New patient should be selected at the beginning of each new patient exam.
 -
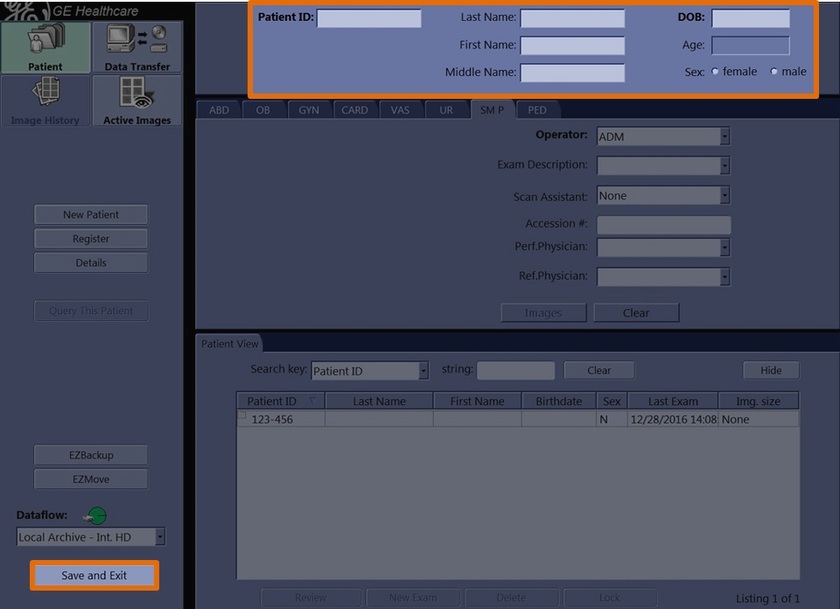
Enter Patient Data with the alphanumeric keyboard. To navigate through the Patient Entry menu, use the Tab key or Trackball and Set to move and fix the cursor. Press "Save and Exit" after finishing the data entry.
-

Select the appropriate probe from the probe indicator. Probes can be used in more than one exam category/application.
-
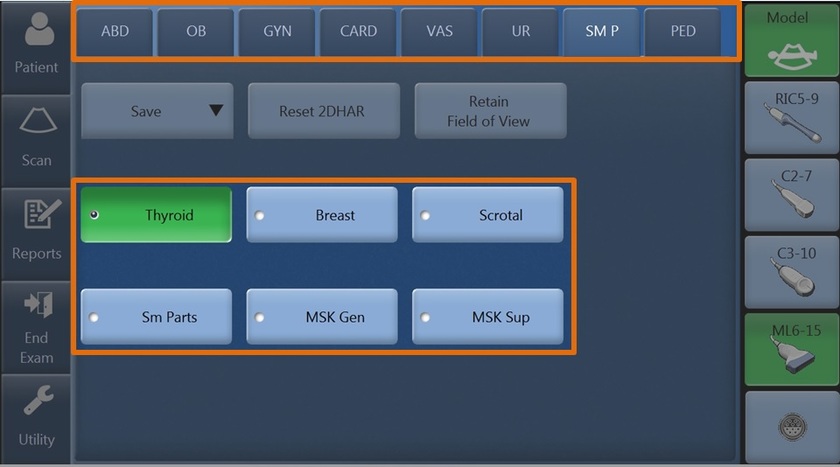
Press Model to enter the preset selection menu. The exam category preset that best describes the desired exam to be performed is chosen after the exam category is selected.
-
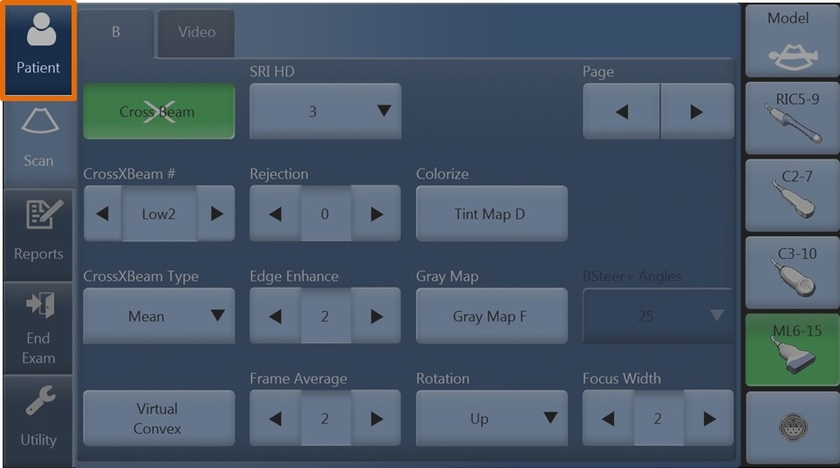
B-mode image optimization parameters: B-Gain (rotate to adjust brightness), Depth (rotate to adjust image depth), AO (press to automatically optimize the image quality).
-
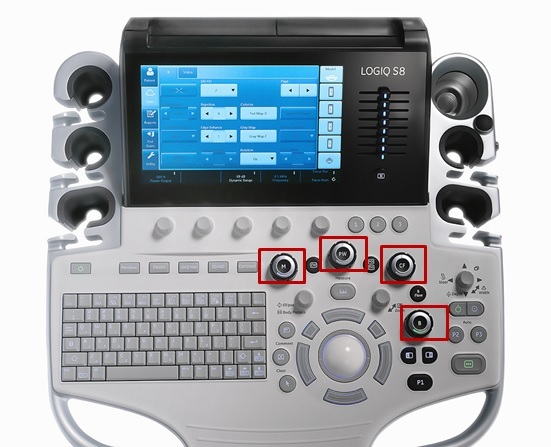
Push the appropriate button to activate the mode. After the activation, adjust the gain of the mode by rotating the same button.
-
A selected list of the imaging parameters per mode are located in the touch panel. At the right, lower side of the monitor, there is an indicator of the functionality of the trackball keys per mode.
-
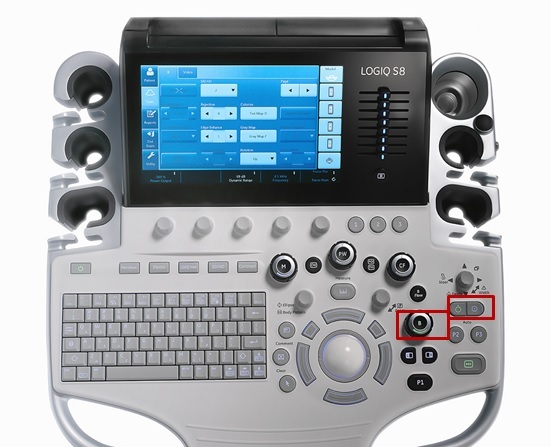
To freeze an image, press Freeze. The key turns green. To reactivate the image, press Freeze again.
-
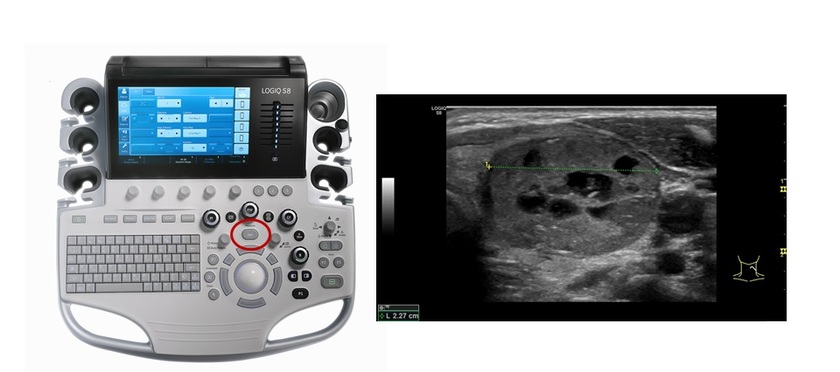
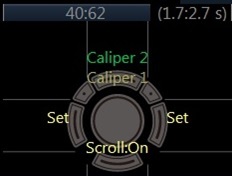
To do a measurement, press Measure. A caliper will appear on the screen. Use the trackball to move the caliper to the appropriate location, press either the left or right trackball key, a second caliper will appear. Place the second caliper in the appropriate location and press the right or left trackball key. A measurement result window appears on the screen with the distance between the two points.
-
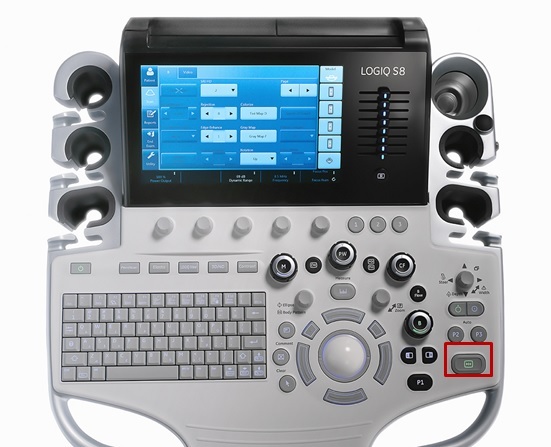
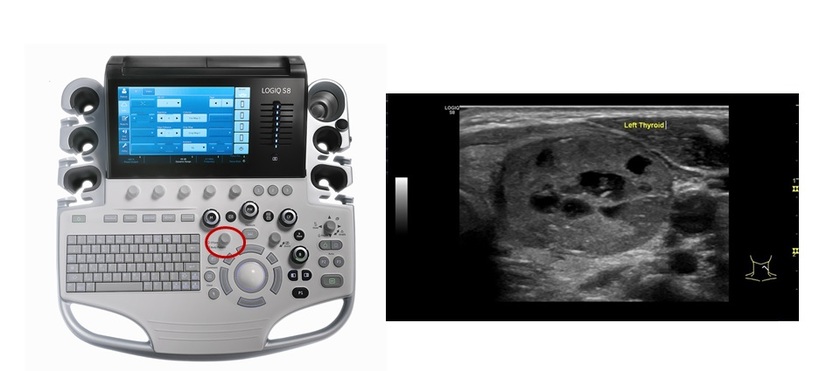 To add a comment, press Comment. This assigns the trackball function to controlling the cursor and displays the comment library on the Touch Panel menu. In Comment mode, text can be added by using the comment library or by typing from the alphanumeric keyboard. After activating the comment mode, a vertical bar type cursor appears on the screen. Use the trackball to move the cursor.
 -
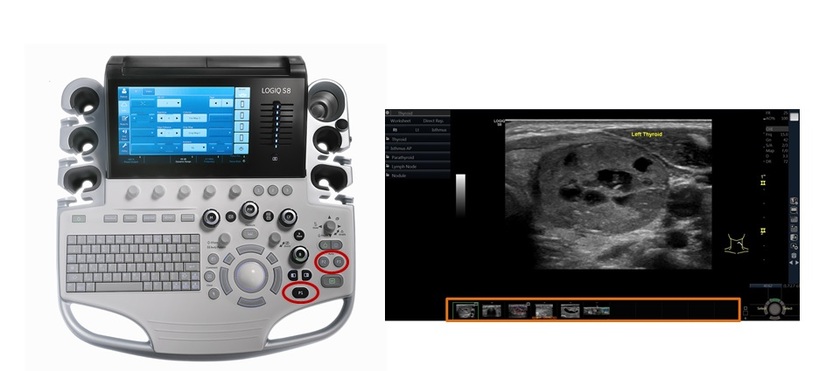
Push P1 to store an image. The images will be visible in a thumbnail view at the bottom or side of the image screen. To store a cine loop, push P1 during live scanning (do not push freeze first). The cine loop stored will be a predetermined length of time configured during system set-up.
-
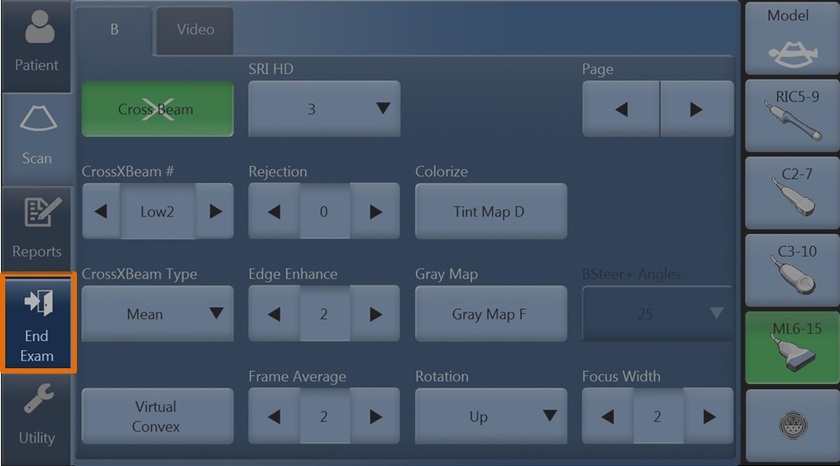
When the exam is finished, press End Exam.
-
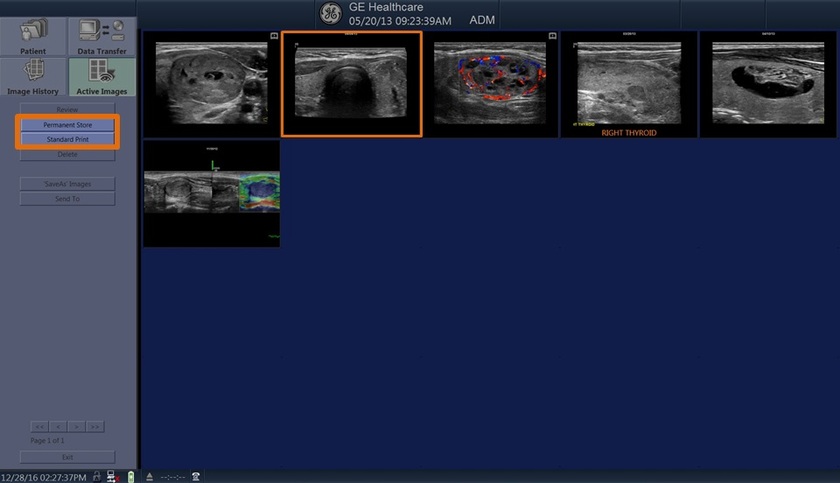
Select the images to print and press Standard Print. Select the images to permanently store and press Permanent Store.