My Trainer
LOGIQ S8 XDclear 2.0
Save images to external media
-

 Insert the media into the drive or connect the USB memory stick to the system. Press Patient to display the Patient screen.
 -
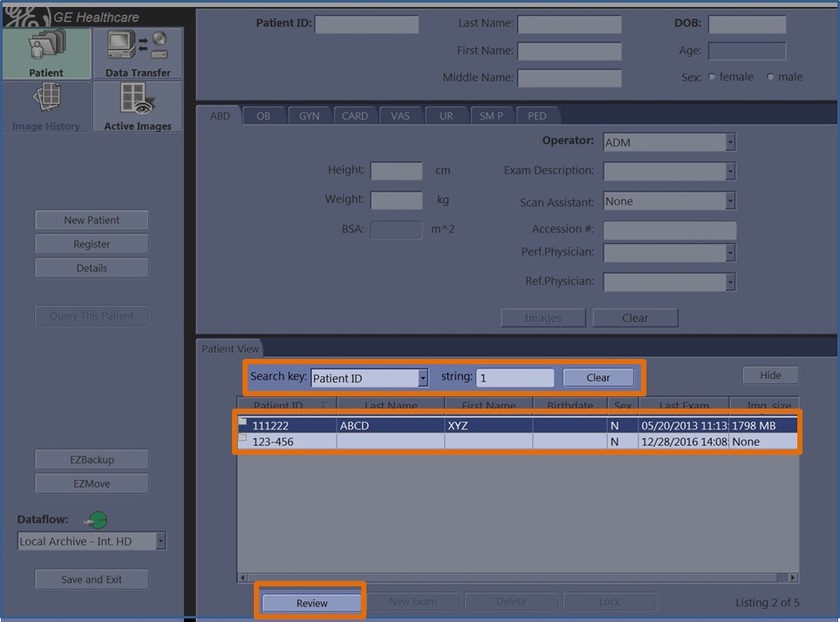 Select the search key (Patient ID, First Name, Last Name, etc.) from drop down list. Type the search string at the string field. Select the appropriate patient. Select Review to review the exam history of this patient. If you select a patient from the current day, Resume exam in place of Review displays to continue the exam.
 -
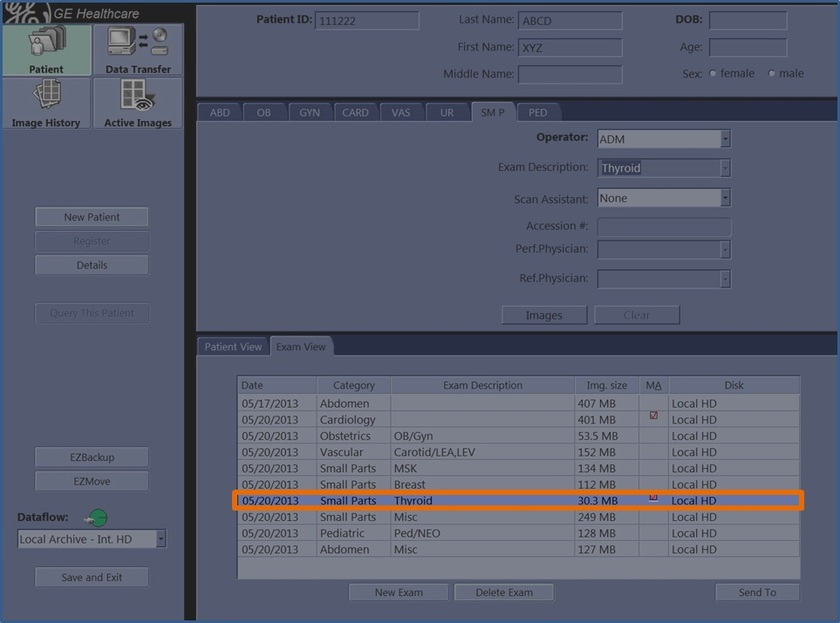 Move the cursor to the desired exam and double-click the trackball set key.
 -
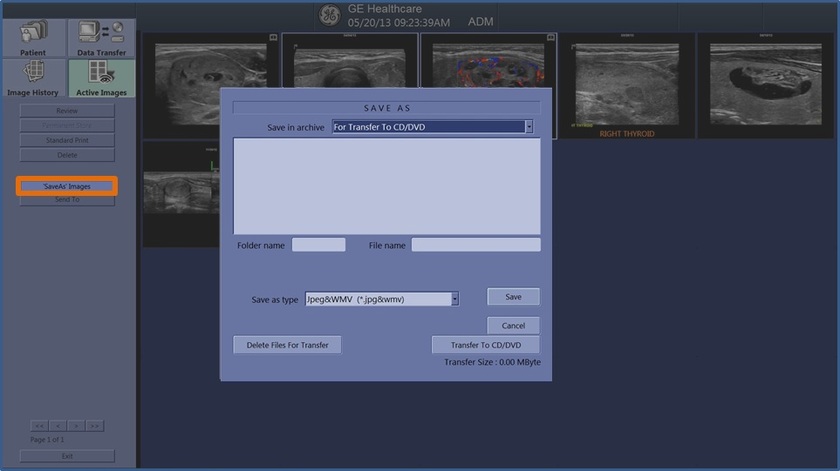
Active Image screen displays. Move the cursor to the image and select it. Select Save As. The Save As menu appears.
-
 Select the media from the Save in Archive pull-down menu. Folder name: You can create the folder for the saved file. File Name: The name of the file is automatically filled in, but you can type a file name as well. Ensure that Jpeg and WMV is selected, then press Save. If you are saving to USB, images are transferred as soon as you press Save. If you are saving to CD/DVD, you need to save images to the hard drive, save images to a temporary buffer first, select Transfer to CD/DVD to permanently store the images to the media.
 -
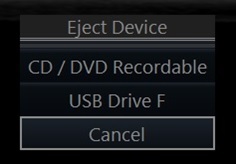 Press F3 to eject the media. Select CD/DVD Recordable or USB drive. Select Yes and Verify files for CD/DVD. This compares the expected number of files with the actual number of files on the media. The files are checked to ensure that they are readable.