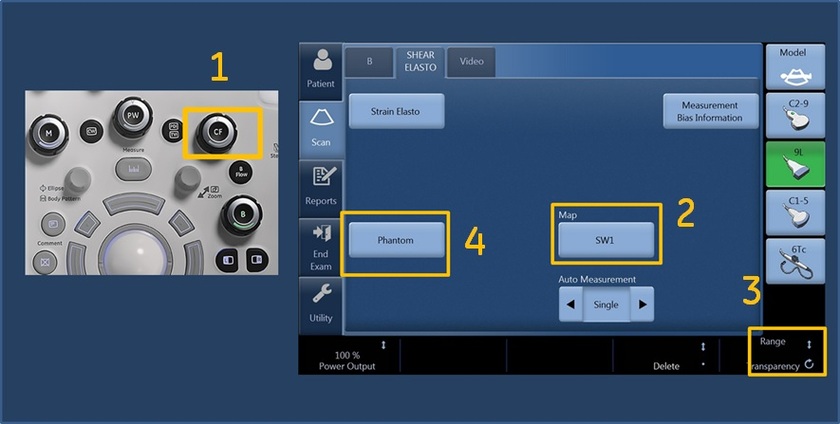
My Trainer

LOGIQ S8 XDclear 2.0

Breast Imaging

  • Activate Shear Wave

    • Select 9L-D probe

    • Select Breast Model

    • Select Elasto hard key on the Keyboard

    • Select Shear or Strain by selecting Button on Touch Panel

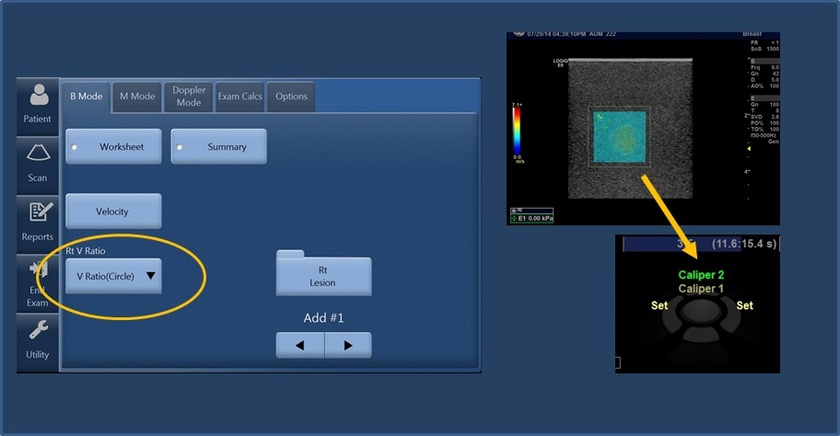
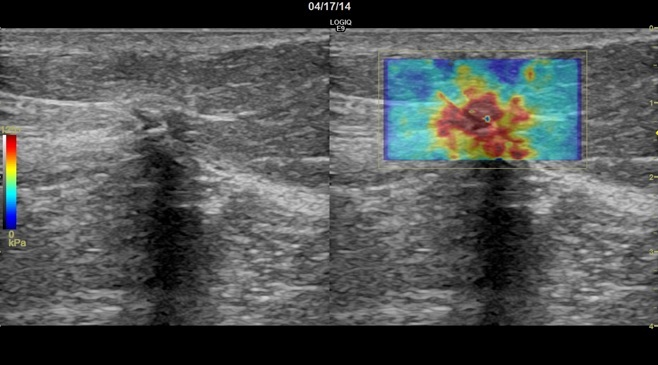
    • Place ROI surrounding lesion of interest including surrounding tissue

    • Select start adjacent to trackball

    • Freeze SWE once optimal image is seen

  • • Once image is frozen, select measurement key on keyboard.

    • Choose Velocity (m/s) or Stiffness(kPa) on touch Panel

    • Place caliper and select set adjacent to trackball

    • Measurement ROI will come up

    • Place measurement ROI within optimal area of Color coded map using Caliper and set keys around trackball

    • Select set adjacent to trackball to save measurement

  • • All measurements will transfer to the Breast measurement worksheet within the breast productivity package.

    • Once measurements are completed, Select Worksheet on Touch Panel to view saved measurements.

  • V Ratio(circle or area)

    • Press “measure”.

    • Select “V-Ratio” measurement and type “Circle” or “Area”.

    • Place the Circle or Draw (Area) the first measurement at the reference tissue and second at the lesion of interest.

    • Use Calipers and set keys on either side of trackball to set position of Circle or when drawing area interest to change size and location.

    • This measurement results in the calculation of the ratio of the V-Indexes of the two areas (reference and lesion).

    • Values are seen in the lower left hand area of monitor and transferred to breast worksheet.

  • Stiff. Ratio(Circle or area)

    • Press “measure”.

    • Select “Stiff.Ratio” measurement and type “Circle” or “Area”.

    • Place the Circle or Draw (Area) the first measurement at reference tissue and second at the lesion of interest.

    • Use Calipers and set keys on either side of trackball to set position Circle or when drawing area of interest.

    • This measurement results in the calculation of the ratio of the Stiff-Indexes of the two areas (reference and lesion).

    • Ratio Values are seen in the lower left hand area of the monitor and transferred to the breast worksheet

  • Overall Gain

    (1) Reducing gain will prevent lower quality velocity measurements from being displayed Shear Wave Map

    (2) Adjust the SWE map to provide different levels of color contrast within SWE Color-coded map. Use E-gray for a gray scale map instead of color- coded. Range

    (3) Changing the range will change the Color assigned to each velocity. Increasing range will show more blue. Decreasing will show more red.

  • Transparency

    (3) Adjust the transparency to change the appearance of the SWE map. Decrease transparency in order to see more vivid color within the SWE map. Increasing will show more of the B mode image within the SWE ROI. Phantom

    (4) Use Phantom button setting only for imaging phantoms.

  • SVD(Sample Volume Depth) Change the SVD via trackball.

    Note: The countdown clock informs you as to when the next Frame of Shear Wave Elastography is acquiring